
Ready-to-assemble (RTA) cabinets are a popular choice for kitchen and bathroom renovations due to their cost-effectiveness and ease of assembly. This guide provides step-by-step instructions to help you successfully assemble your RTA cabinets‚ ensuring a seamless and efficient process.
1.1 What Are RTA Cabinets?
RTA (Ready-to-Assemble) cabinets are pre-manufactured cabinet units that are shipped in flat boxes and require assembly. They are designed to be cost-effective and easy to transport‚ making them a popular choice for DIY projects and budget-friendly renovations. These cabinets typically include pre-drilled holes‚ hardware‚ and instructions for straightforward assembly. RTA cabinets offer a customizable and affordable solution for kitchens‚ bathrooms‚ and other spaces‚ appealing to homeowners and DIY enthusiasts alike.
1.2 Importance of Assembly Instructions
Assembly instructions are crucial for successfully assembling RTA cabinets‚ ensuring accuracy and preventing costly mistakes. These guides provide step-by-step directions‚ helping users understand how to properly align panels‚ secure hardware‚ and avoid damaging components. Without clear instructions‚ the assembly process can become confusing‚ leading to incorrect installation and potential safety hazards. Following the instructions ensures a sturdy‚ functional‚ and visually appealing final product. Additionally‚ they often include troubleshooting tips and safety precautions to make the process smoother and safer for DIY enthusiasts and professionals alike.
Tools and Materials Required
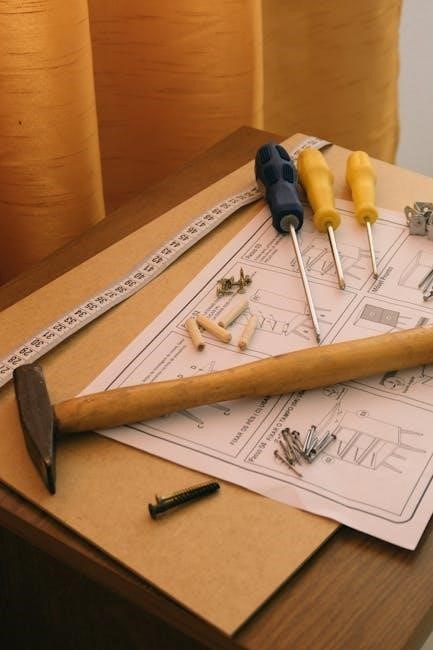
Essential tools: screwdriver‚ power drill‚ rubber mallet‚ and clamps. Materials needed: screws‚ shelf clips‚ hardware brackets‚ and wood glue. Ensure all items are ready before starting assembly.
2.1 Essential Tools for Assembly
Essential tools: screwdriver‚ power drill‚ rubber mallet‚ clamps‚ and Allen wrench. Optional tools: nail gun‚ stapler‚ and wood glue. Gather all tools before starting to ensure a smooth process. These tools are necessary for securing panels‚ tightening screws‚ and aligning components properly. Additional materials like shelf clips and hardware brackets are typically included in the RTA cabinet kit. Always refer to the provided instructions for specific tool recommendations to avoid delays or mistakes during assembly.
2.2 Hardware and Parts Included
Your RTA cabinet kit includes pre-drilled panels‚ shelves‚ and hardware. Hardware: screws‚ shelf clips‚ metal brackets‚ and drawer glides. Parts: side panels‚ back panel‚ top/bottom panels‚ and drawer boxes. Ensure all components are accounted for before starting. Refer to the included inventory list to verify each item. Additional materials like wood glue or wall brackets may be required for specific installations. Always organize parts to streamline the assembly process and follow the instructions for proper hardware usage.
Base Cabinet Assembly
Begin by assembling the base cabinet’s side panels and back panel. Attach the shelves using shelf clips for support. Follow the instructions carefully to ensure alignment and stability.
3.1 Attaching Side Panels
To attach the side panels‚ align them with the base cabinet’s frame‚ ensuring proper fitment. Use the provided screws to secure the panels tightly. Start by inserting screws into the pre-drilled holes‚ then gently tighten them. Flip the cabinet to access the inside and add center screws to the L-brackets‚ tightening without over-tightening. Repeat for the side screws. This step ensures structural integrity and prepares the cabinet for further assembly. Always refer to the diagrams in your RTA cabinet assembly instructions for precise alignment.
3.2 Securing the Back Panel
Attach the back panel by aligning it with the pre-drilled holes on the cabinet frame. Use screws to secure it tightly‚ ensuring the panel is flush with the edges. Insert screws into the designated holes‚ starting from the center and working outward. Tighten firmly but avoid over-tightening‚ which could warp the panel. This step is crucial for maintaining the cabinet’s structural integrity. For models requiring additional support‚ refer to the RTA cabinet assembly instructions for specific drilling or adjustment guidance.
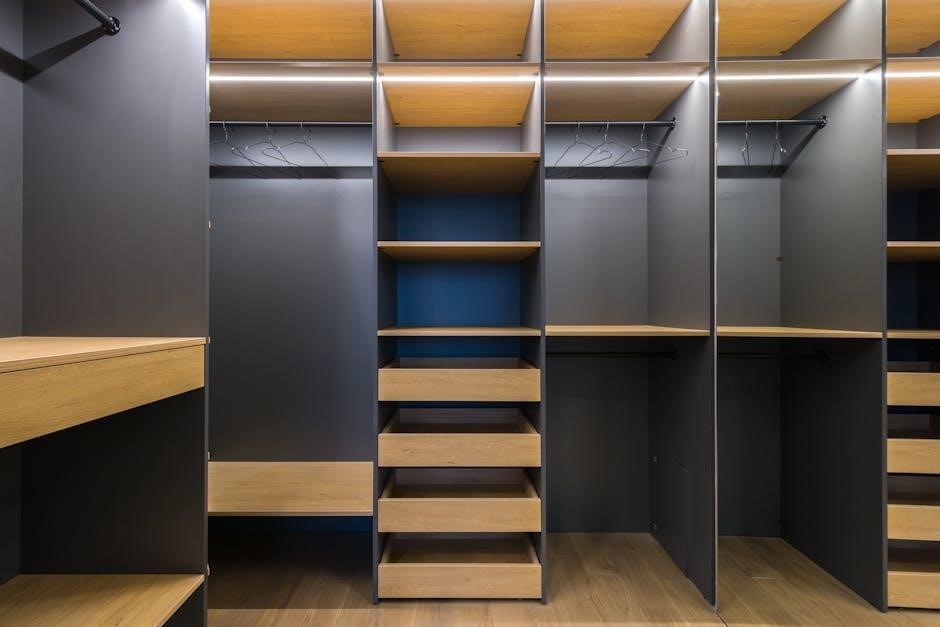
3.3 Adding Shelves and Shelf Clips
Insert shelf clips into the pre-drilled holes inside the cabinet‚ ensuring they are evenly spaced and aligned. Place the shelf on top of the clips‚ making sure it fits snugly. Secure the shelf by screwing the clips into place. Check the shelf for levelness and adjust as needed. For adjustable shelves‚ repeat the process for additional levels. Tighten all screws firmly to ensure stability. Refer to the RTA cabinet assembly instructions for specific clip placement and shelf alignment guidance to achieve a sturdy and even surface.
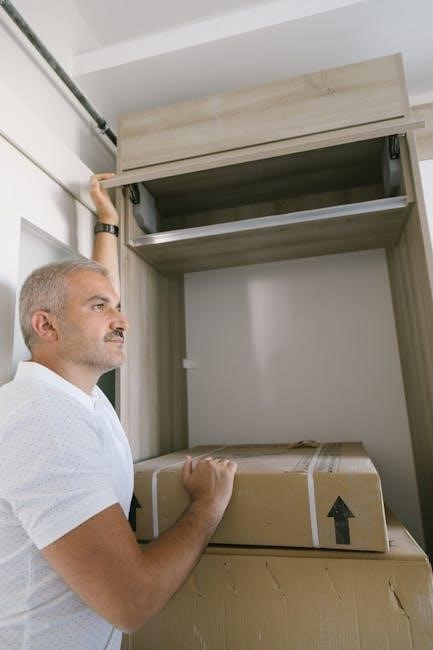
Wall Cabinet Assembly
Begin by attaching the top panel‚ ensuring edges are aligned and secure. Install the back panel for stability‚ then mount wall brackets according to instructions.
4.1 Attaching the Top Panel
Begin by aligning the top panel with the cabinet frame‚ ensuring edges are flush. Use screws to secure the panel‚ starting from the center and working outward. Tighten evenly to avoid warping. Double-check alignment with the pre-drilled holes in the cabinet sides. Once the top panel is firmly attached‚ proceed to install the back panel for added stability. Make sure all screws are tightened properly but avoid over-tightening‚ which could damage the material. This step ensures a sturdy base for the wall cabinet assembly.
4.2 Installing the Back Panel
Position the back panel by aligning its edges with the cabinet frame. Gently clip the panel into place using the pre-installed clips or brackets. Secure it with screws‚ starting from the bottom for stability. Ensure the panel is flush with the cabinet edges and aligned with pre-drilled holes. Tighten screws evenly but avoid over-tightening to prevent damage. The back panel provides structural support and ensures the cabinet remains square. Once installed‚ proceed to mount the wall brackets for hanging the cabinet on the wall. This step is crucial for maintaining the cabinet’s integrity and proper alignment.
4.3 Mounting Wall Brackets
Locate the pre-drilled holes on the top and bottom of the cabinet’s back panel. Attach the wall brackets to these holes using the provided screws. Ensure the brackets are level and securely fastened. On the wall‚ mark the bracket positions‚ aligning them with the cabinet’s mounting points. Drill pilot holes and screw the wall-side brackets into place. Hang the cabinet by aligning the brackets and tightening the screws firmly. Double-check the cabinet’s level and adjust if necessary. This ensures a stable and secure installation for your wall cabinet.
Drawer Assembly
Drawer assembly involves installing guides‚ attaching drawer boxes‚ and aligning the drawer slides. Secure the drawer to the cabinet frame using screws‚ ensuring proper fitment and smooth operation.
5.1 Installing Drawer Guides
Installing drawer guides is essential for smooth drawer operation. Begin by locating the pre-drilled holes on the cabinet frame. Attach the drawer slides to the sides of the cabinet using screws. Ensure the slides are level and aligned properly. Next‚ install the drawer guides on the drawer box‚ making sure they match the cabinet slides. Tighten all screws firmly but avoid over-tightening. Double-check the alignment to ensure the drawer slides in and out effortlessly. Proper installation guarantees efficient and quiet drawer movement.
5.2 Assembling and Placing Drawer Boxes
Assemble the drawer box by attaching the sides‚ bottom‚ and back panels using screws. Ensure all edges align properly. Once assembled‚ place the drawer box into the cabinet‚ aligning it with the pre-installed drawer guides. Gently push the drawer box into the cabinet until it clicks into place. Double-check that the drawer operates smoothly and fits securely within the cabinet frame. Proper alignment ensures optimal functionality and prevents uneven wear on the drawer and guides. This step completes the drawer assembly process.
Additional Components
Additional components like Lazy Susan‚ pantry units‚ and drawer organizers enhance functionality. These components require specific hardware and alignment to ensure proper installation and usability. Refer to the PDF instructions for detailed guidance on installing these optional features to maximize your cabinet’s potential and customize your space effectively.
6.1 Lazy Susan Installation
Installing a Lazy Susan in your RTA cabinet enhances accessibility and maximizes corner space. Begin by attaching the Lazy Susan hardware to the cabinet floor using the provided screws. Ensure the rotating shelves align with the cabinet’s inner dimensions. Secure the shelves to the base using the included brackets. Tighten all screws firmly to prevent wobbling. Finally‚ place the shelves and test the rotation to ensure smooth operation. Follow the PDF instructions carefully to achieve a stable and functional setup.
6.2 Pantry Cabinet Assembly
Assembling a pantry cabinet involves attaching shelves and ensuring proper alignment. Begin by unboxing and organizing all parts. Attach the shelves to the side panels using shelf clips and screws. Secure the back panel tightly to maintain structural integrity. Align the doors with pre-drilled holes and install hinges. Attach handles or knobs according to the PDF instructions. Double-check all connections for stability. Finally‚ inspect the cabinet for any gaps or misalignments before placing items inside.

Safety Tips and Precautions
Always wear protective gear‚ use a rubber mallet to avoid damaging parts‚ and ensure the work area is clear. Secure cabinets to walls to prevent tip-overs and follow instructions carefully to avoid injuries.
7;1 General Safety Guidelines
When assembling RTA cabinets‚ prioritize safety to avoid accidents. Always wear protective gear like gloves and safety glasses to prevent injuries. Use a rubber mallet instead of a hammer to avoid damaging parts and ensure a secure fit. Keep the workspace clear and well-lit to maintain visibility and prevent tripping hazards. Follow the provided instructions carefully‚ and if unsure about any step‚ consider consulting additional resources or seeking assistance. Proper preparation and attention to detail are key to a safe and successful assembly process.
7.2 Preventing Cabinet Tip-Overs
To ensure stability and safety‚ always anchor your RTA cabinets to the wall using provided brackets or anti-tip hardware. Proper assembly is crucial‚ as loose parts can lead to instability. Place heavy items at the bottom to lower the center of gravity. Use levelers to ensure the cabinet is even and secure. Regularly check all screws and brackets to prevent loosening over time. Following these steps will help prevent tip-overs and ensure your cabinets remain stable and secure for years to come.
Troubleshooting Common Issues
Common issues include misaligned panels‚ loose screws‚ or improper bracket installation. Check alignment‚ tighten screws‚ and ensure brackets are securely attached. Consult manual or contact support for unresolved problems.
8.1 Aligning Panels and Frames
Ensure all panels and frames are properly aligned before securing them. Use a rubber mallet to gently tap components into place‚ avoiding force that may damage edges. Check for squareness by measuring diagonals—both should be equal. If misalignment occurs‚ remove screws and adjust panels. Reattach securely‚ ensuring tight fits. Proper alignment is crucial for stability and functionality‚ preventing future issues like door misalignment or structural weakness.
8.2 Tightening Brackets and Screws
Tighten all brackets and screws firmly‚ but avoid over-tightening‚ which can damage the material. Use a screwdriver to secure components‚ ensuring brackets are snug against panels. Double-check all connections for stability. If screws feel loose‚ tighten gradually until firm. For final adjustments‚ use a rubber mallet to tap components into place‚ ensuring proper alignment and fit. Proper tightening ensures structural integrity and prevents wobbling or shifting during use.